Shop Floor Diagnostics: Fixing Elastic Springback and Hinge Amplification in 2024 Aluminium
Shop Floor Diagnostics: Fixing Elastic Springback and Hinge Amplification in 2024 Aluminium.
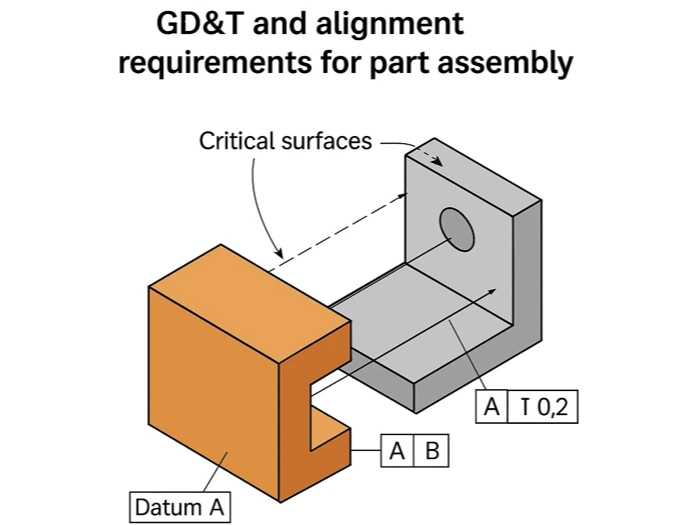
Ever chased a True Position (0.02mm) failure on the CMM, optimized your CNC parameters, and still watched the parts fail? We just lived through this nightmare on an OEM project machining asymmetrical 2024 aluminium components for aviation industry, and the root cause wasn't the cutting tool—it was our own fixture.
Here is the raw engineering breakdown of how a seemingly secure fixture setup can become a force multiplier for GD&T failures, and how we solved it on the shop floor.
The Setup & The Failure Trigger
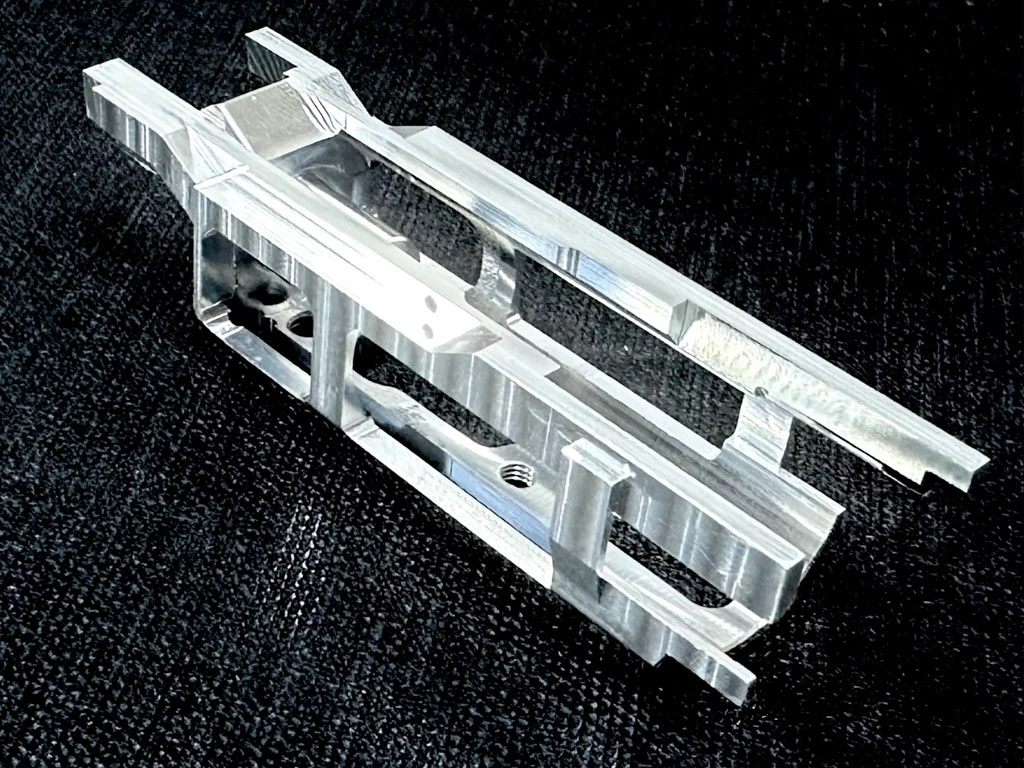
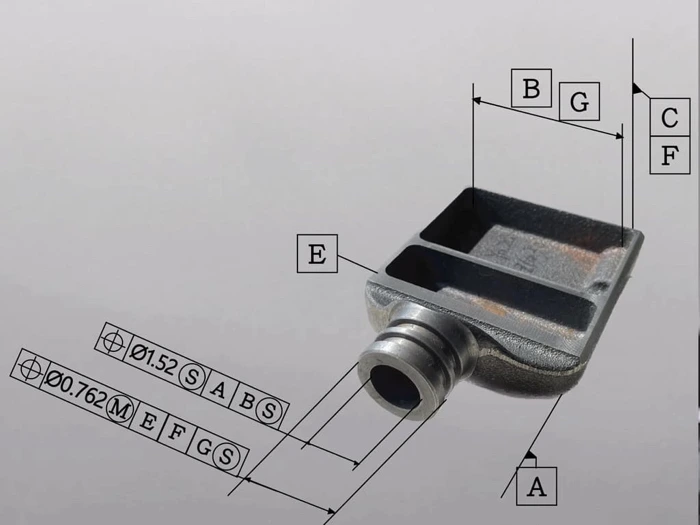
We were dealing with a complex, asymmetrical workpiece featuring pocketed thin walls (low rigidity) and critical hole patterns with a massive Z-axis height offset relative to the datum plane.
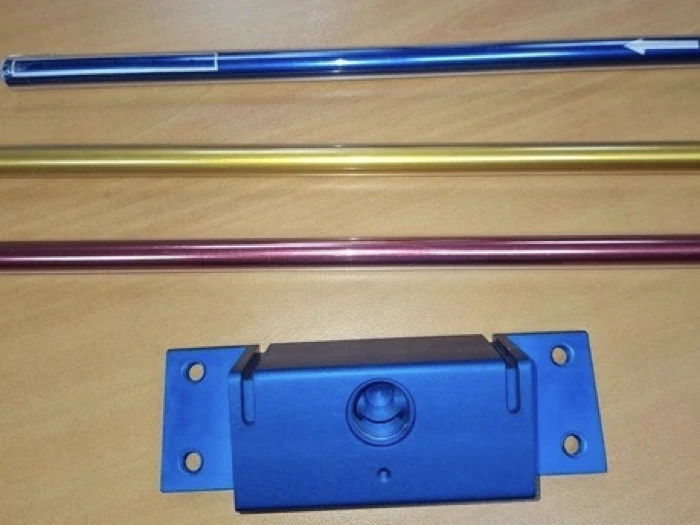
To hold the part, our fixture utilized two tight-fit locating pins. During loading, operators had to force the part onto both pins. If the forged blank had even a microscopic twist, forcing it onto two rigid, tight-fit pins "coerced" the part flat while clamped.
The Hidden Mechanism: The Hinge Effect
Here is the physics of what actually went wrong behind the scenes:
- Loss of Rigidity: Heavy pocketing significantly reduced the structural stiffness of the thin-wall zones.
- Over-Constraint (Over-Determination): The dual tight-fit pins over-constrained the part, forcing elastic deformation and a microscopic angular tilt during clamping.
- The Lever Arm: Because there was a large height gap (Z-offset) between the hole locations and the datum plane, this tiny angular tilt acted as a pivot point—creating a Hinge Effect that drastically amplified the positioning error at the top of the part.
- The Springback: The CNC drilled the holes perfectly relative to the machine coordinates. But the moment the clamps were released, the stored elastic energy snapped the part back to its relaxed state, throwing the True Position completely out of spec.
The Engineering Turnaround
Once we diagnosed the clamping-induced strain, we implemented three immediate, practical shop floor countermeasures: - Fixture Optimisation (The Diamond Pin Logic): We stopped over-constraining the part. We ground down the outer diameter of one locating pin (essentially converting it to a diamond pin function). This maintained perfect clocking orientation while allowing the material room to breathe, eliminating the forced elastic strain.
- Program Compensation (OP1 Tuning): We adjusted the OP1 machining parameters to intentionally offset and neutralize the predictable baseline deformation of the raw blanks.
- Operational SOP Controls: We rewrote the operator loading sequence. The clamping and bolt-tightening sequence was strictly re-ordered to lock down the deformed/sensitive zones first, preventing stress buildup across the weaker thin-walled structures.
The Field Takeaway: A fixture that holds a part "dead straight" by brute force is a lying fixture. If you have to force a part onto locating pins, you aren't fixing a tolerance issue―you are just hiding it until the clamps open. Manage your constraints, watch your Z-axis leverage, and don't let the Hinge Effect break your GD&T.
Have you ever battled over-constraint or springback issues on asymmetrical parts?